


Silhouette Website Header – Page 4 of 4
Adding some finishing touches.
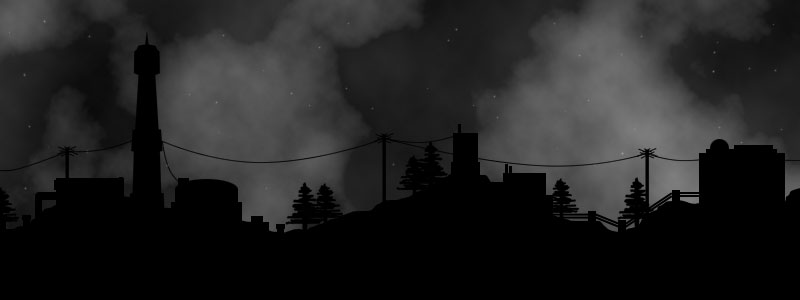
10 – Pipes and power lines
 Now use the Pen Tool to put a point in between each of the existing points. Use the arrow keys to nudge each of the new points downwards, to give a realistic sag to the path. If you need to select a point, you can Ctrl+Click on it.
 Create a new layer.
 Click on the Brush Tool, and choose the smallest brush (size 1).
With the Pen Tool, right-click the path, and click Stroke Path. Then choose Brush.
Press Enter to make your path go away.
Repeat this process for any smaller power lines you wish to add.
 I've also used the Line Tool again here, to add a system of pipes at the right hand side.
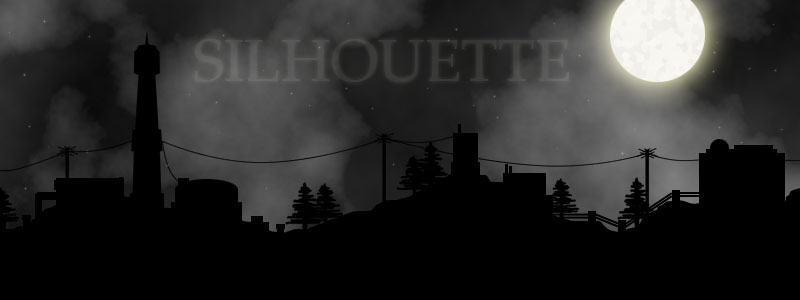
11 – Adding the Moon and a title
Create a new layer.
 While holding Shift, use the Elliptical Marquee Tool to draw a circle.
 Choose a light yellow colour, and fill the selected area, using the Paint Bucket Tool.
Click Filter > Artistic > Sponge. Press OK if necessary.
Press Ctrl+D to deselect.
With anything coloured, it's unlikely that you've chosen the best colour. Bring up the Hue/Saturation properties, by pressing Ctrl+U. Play with the sliders until you get a realistic-looking moon, and press OK. (I recommend reducing the saturation, and increasing the brightness.)
Right-click your moon layer in the Layers window, and choose Blending Options. Give it an Outer Glow, and increase the Size to 35.
 Use the Type Tool to add some text. I've used white 60-point Palatino Linotype here. To create the transparent effect, reduce the layer's Opacity to around 10%.
