


Silhouette Website Header – Page 3 of 4
Time to put it all together.

7 – Buildings
Go back to your main image.
 Create a new layer, and move it to the top of your Layers window.


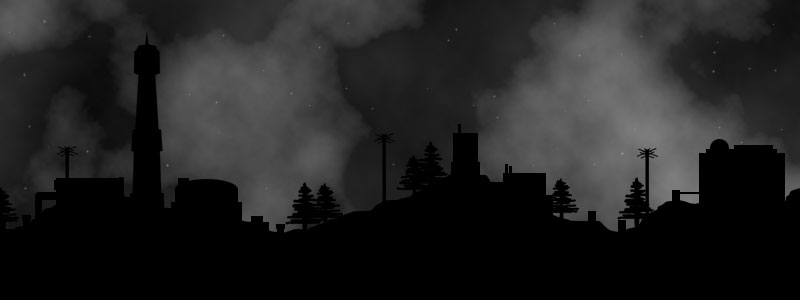
 Use the Rectangular Marquee Tool, the Elliptical Marquee Tool, and the Paint Bucket Tool, to create a variety of buildings. (Alt+Backspace is the shortcut key for filling an area with the foreground colour.) I created this image, and I'm not any kind of artist. The key here is detail. You need to spend some time on this step. An "industrial" theme gives you plenty of room for creativity. Zoom in (Ctrl +) and add tiny ridges, chimneys, stepped areas, and other details. None of your buildings should be nondescript squares.
The placement of the buildings should be fairly random. Don't space them out across the image.
8 – Adding the doodads
 Now drag in your doodads, with the Move Tool.
Press Ctrl+T to resize them. Drag the corner inward, while holding down Shift. (Holding Shift stops the image from changing proportions.)
You can copy your doodads easily, by using the Move Tool while holding down Alt.
It's okay (and looks natural) for doodads to overlap each other and your buildings.
Don't use the same tree twice in one spot.
You can use the tower twice if you need to. Put one at each end of your image, and make them different sizes.
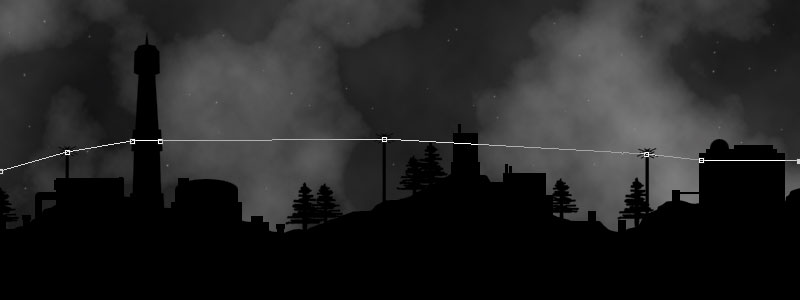
9 – Power path
Create a new layer.
 Use the Pen Tool to draw a line of points that go straight through all the points where your power lines will go.
