


Glitter Swirls – Page 2 of 2
This page covers the creation of the swirly effect.
5 – Creating a Gradient
Press Ctrl+D to Deselect the area.
 In the Layers window, create a new layer.
 Choose the Gradient Tool. (Remember that it might be hidden under the Paint Bucket Tool.) A little coloured bar, representing the gradient, will appear at the top left of the screen. Click on it. (In Photoshop 5.5 or earlier, click Options Tab > Edit.)
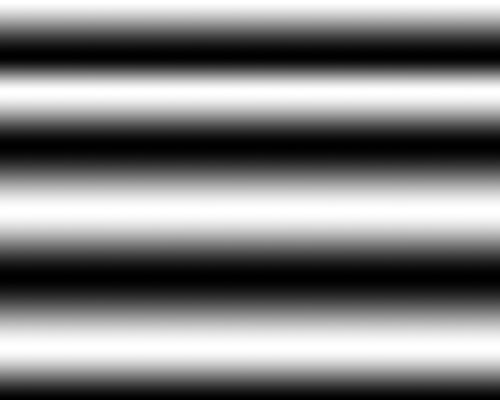
Add black and white tabs across the bar at the bottom of the screen, such that the gradient alternates between black and white. There's definitely no need to be precise here, as this gradient is going to be mangled in the next step. :)
Press Ok, and apply this gradient from the top of the screen to the bottom.

6 – Mangling the Gradient
The main purpose for creating the gradient in the previous step, is that it's a good source of dark and light areas. As big bands of black and white, the gradient isn't appropriate here, but after a bit of mangling, it can start to look very nice.
Click Filter > Distort > Wave. Play around with the sliders until you get a reasonable wave. (Not a tidal wave or a ripple.)
Press Ok. Your gradient should be wavy. Repeat this process several times, by pressing Ctrl+F. If you're not happy with how it turns out, Undo all your waves, and click Filter > Distort > Wave again, to get a new wave.
Change the Gradient from Normal to Overlay.
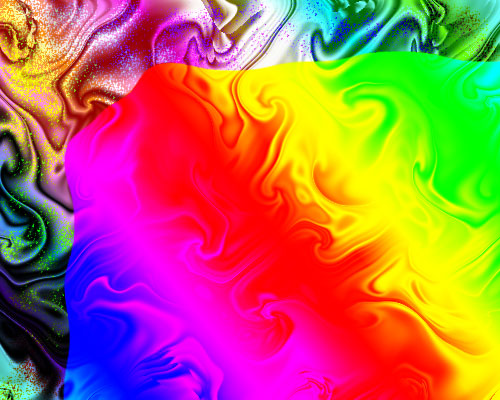
7 – Adding some colour variation
In the Layers window, create a new layer.
Select the Gradient Tool, and edit the gradient as before, but instead of putting in black and white tabs, just choose the rainbow-coloured gradient. Press Ok and apply it diagonally across the image. Change this layer's Mode from Normal to Difference.
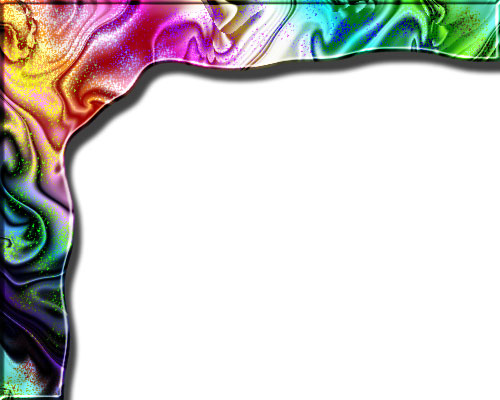
8 – Cleaning up and adding Effects
You may notice that both your gradients extend over the edge of your curved menu area. To cut them back, Ctrl+Click on your yellow base layer in the Layers list. This will select its outline.
Click Select > Inverse. This selects the opposite of the selection you just had.
In the Layers list, click on the rainbow layer, and press Delete. Then click on the swirly layer and press Delete again.
To add some Effects, right-click the base (yellow) layer, and click "Blending Options".
Add a Bevel and a Drop Shadow.
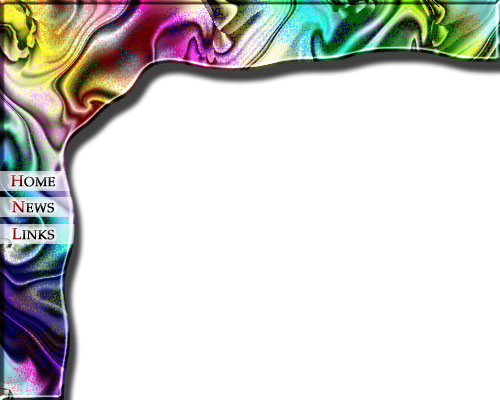
9 – Final touches
At the end of most Photoshop projects, I usually play around with the Hue/Saturation slider (Ctrl+U) to see if I can improve the colours. In this case, I reduced the Saturation as low as it can go. The colours look much softer now.
I've used Palatino Linotype for the font here, and given it a Bevel and Stroke (Outer Glow for your 5.5ers out there.)
The white bars under the text are set at 65% Opacity. I've cut off their ends, so that they're flush with the curved edge. To do this, Ctrl+Click on the base (yellow) layer and then Invert the selection (Select > Invert). Then press Delete.
