


Creating a Web Page Header in Photoshop – Page 2 of 3
This page of the tutorial deals with adding gradients and watermarks.

7 – Making an uneven Gradient
 Click on the Gradient Tool. Then click on the visual representation of the gradient.
Put in an alternating series of about eight black and white tabs, as shown, and click Ok.
8 – Applying the Gradient
Create a new layer. If the blue area isn't already selected, Ctrl+Click the layer that the blue area is in.
Click on your new layer in the layer list, and apply the Gradient Tool across it. Change the layer from Normal to Overlay.
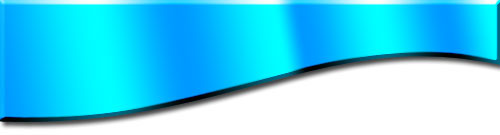
9 – Choosing a colour and texture
Press Ctrl+D to deselect your selection. Click on your blue layer again. Press Ctrl+U to bring up the Hue/Saturation properties. Play with the sliders until you've got a nice colour.
Although Adobe Photoshop 6.0 and Adobe Photoshop 7.0 have special texturing effects, I still prefer the old Sandstone texture. Click Filter > Texture > Texturizer, and choose "Sandstone".
Whenever you make anything coloured in Adobe Photoshop, always play around with the Hue/Saturation Properties (Ctrl+U) to see if you can find a better colour. Don't be afraid to reduce the saturation - your image may look drab at first, but you'll find it will add some realism.

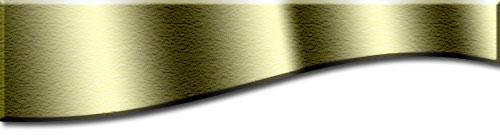
10 – Creating a watermark
Click on your topmost layer in the layers list.
 Click on the text tool and type "kj" in Wingdings font, with the colour set to black, and the font size set to 100 or more. Change the layer from Normal to Overlay. This is a simple way of creating some nice swirly watermarks.
You may notice, however, that parts of the watermark extend over the edge of the area and into the shadow.

11 – Cropping the watermark
Right-click on your swirly watermark layer in the Layers list, and Rasterize it. It can now be edited.
Ctrl+Click on your gold-coloured layer to select it. Press Shift+Ctrl+I to invert your selection (this selects the white area) and press Delete.
